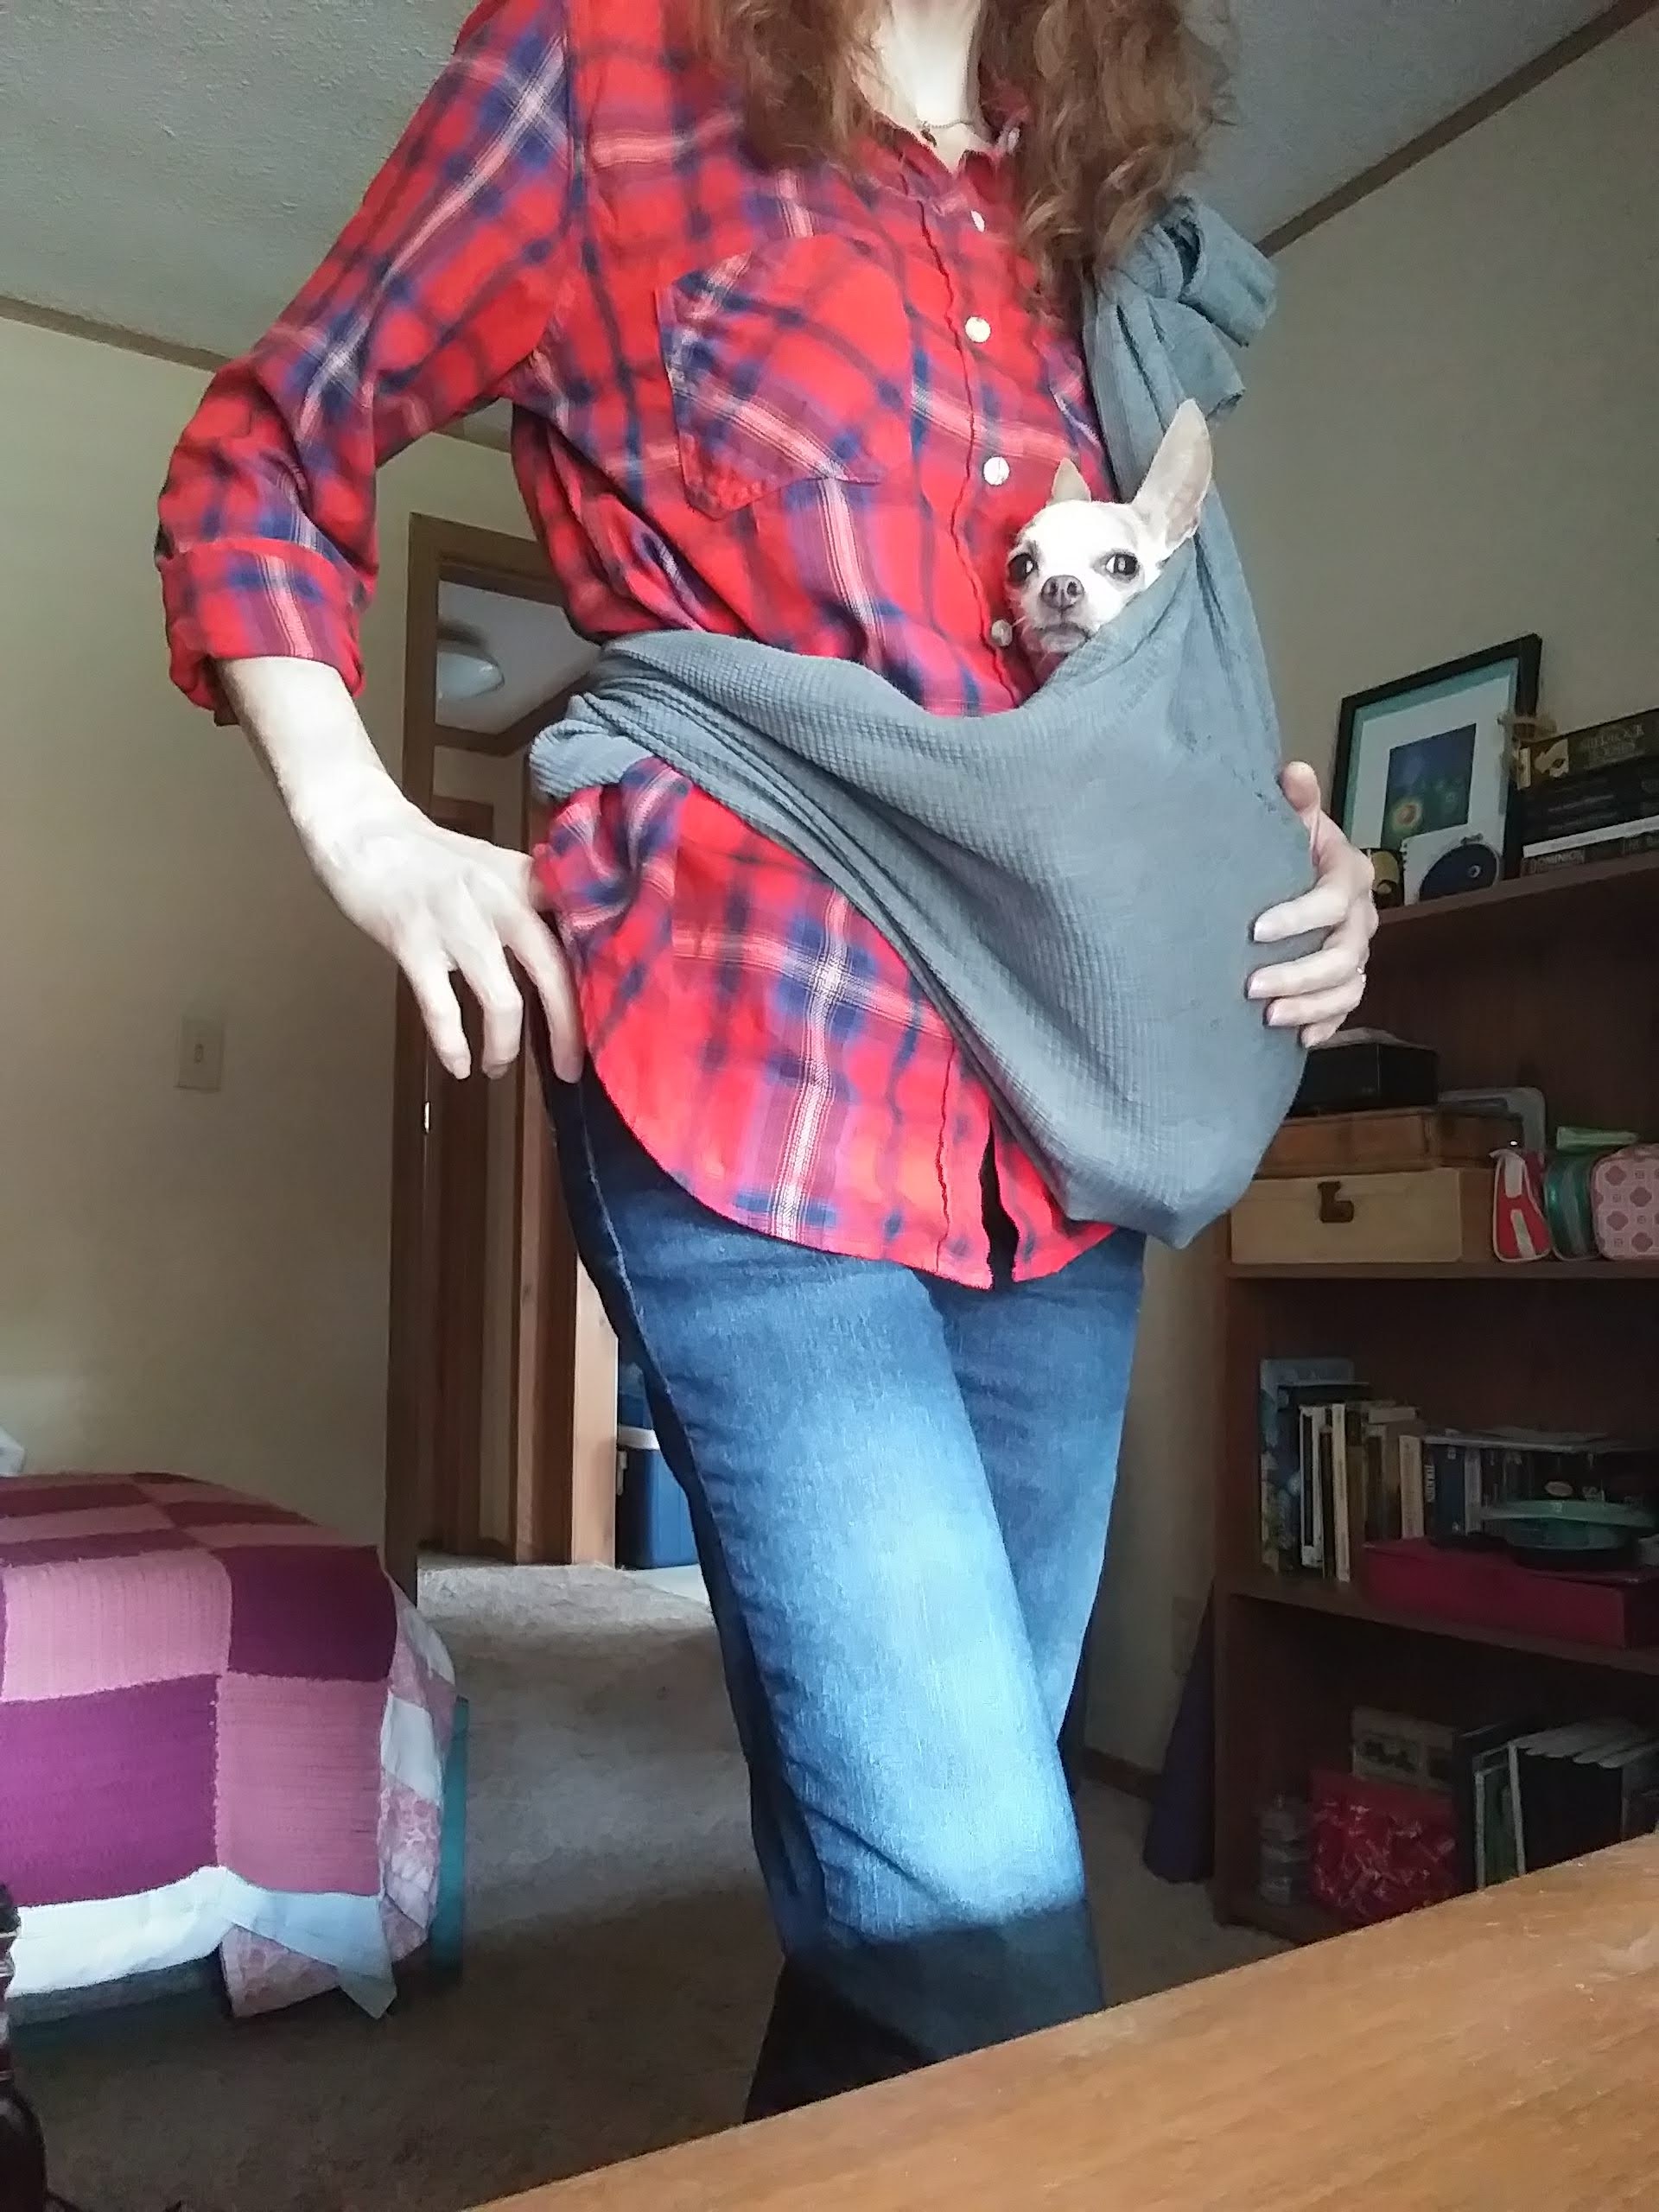
How To Make A Sling For Your Dog: A Step-by-Step Guide
Ever wondered how to make a sling for your dog? Whether it's for post-surgery recovery or mobility assistance, creating a DIY sling can be a lifesaver. A dog sling is not just a tool; it’s a bridge between your furry friend and their comfort. Let’s dive into why making one is essential and how simple it can be.
As a dog owner, you want nothing but the best for your pup. Whether they’re dealing with an injury, arthritis, or simply need a little extra help getting around, a sling can be a game-changer. But who says you need to spend a fortune on one? With some basic materials and a bit of creativity, you can craft a sling that works just as well as the store-bought ones.
This guide will walk you through everything you need to know about making a sling for your dog. From the materials to the step-by-step process, we’ve got you covered. So, grab your supplies, and let’s get started!
- Baby Alien Fan Bus Explodes The Viral Video You Need To See
- Latest Telugu Kannada Movies Whats New In 2025
Table of Contents
- Why You Need a Dog Sling
- Materials You’ll Need
- Step 1: Measure Your Dog
- Step 2: Cut the Fabric
- Step 3: Sew the Handles
- Step 4: Add Padding (Optional)
- Tips for Using the Sling
- Caring for Your DIY Sling
- Common Questions About Dog Slings
- Conclusion
Why You Need a Dog Sling
Let’s face it, life happens. Whether your dog is recovering from surgery, dealing with a sprain, or just getting older, mobility issues can arise. A sling provides the support your furry friend needs to move around without pain. Plus, it’s a great way to bond with your pup while ensuring their comfort.
Think about it. Store-bought slings can be pricey, and sometimes they don’t fit perfectly. Making your own sling means you can customize it to your dog’s unique size and needs. Plus, it’s a fun project that lets you channel your inner handyman (or woman).
- Ullu Web Series Hub Watch New Web Series Originals Online
- Kai Razy Tiktok Stars Rise What Makes Him Worth Watching
And hey, who doesn’t love saving money while still giving their dog the best care possible? A DIY sling is not only cost-effective but also eco-friendly. You can repurpose old materials, reducing waste and helping the planet at the same time. It’s a win-win situation.
Materials You’ll Need
Before we dive into the steps, let’s talk about what you’ll need. The good news is, most of these materials are probably already lying around your house. If not, they’re easy to find and affordable. Here’s the list:
- Sturdy fabric (like canvas, fleece, or old towels)
- Measuring tape
- Scissors
- Sewing machine or needle and thread
- Velcro or buckles (optional)
- Foam padding (optional)
Pro tip: If you’re using an old towel or blanket, make sure it’s clean and free of any tears or holes. You want the sling to be durable and safe for your dog.
Step 1: Measure Your Dog
This is where precision comes in. Measuring your dog correctly ensures the sling will fit snugly without being too tight. Here’s how to do it:
- Measure the distance from your dog’s chest to their tail.
- Measure the circumference of their chest.
- Measure the length of their legs from the base to the paw.
These measurements will help you determine the size of the fabric you’ll need. Remember, it’s better to have a little extra fabric than too little. You can always trim it later.
Why Measurements Matter
Getting the right measurements is crucial because a poorly fitting sling can cause discomfort or even injury. Think of it like buying a pair of shoes—if they don’t fit right, it’s not gonna be a good experience. Your dog deserves the best, so take your time with this step.
Step 2: Cut the Fabric
Now that you’ve got your measurements, it’s time to cut the fabric. Lay it out flat on a clean surface and use a ruler or straight edge to ensure your cuts are straight. Here’s what you’ll need to do:
- Cut a rectangle that’s slightly larger than your dog’s chest measurement.
- Cut two strips for the handles. These should be long enough to go around your dog’s chest and meet comfortably under their belly.
If you’re feeling fancy, you can add some decorative stitching or patterns to the fabric. Just make sure it doesn’t compromise the sling’s durability.
Choosing the Right Fabric
Not all fabrics are created equal when it comes to making a dog sling. You want something that’s strong enough to support your dog’s weight but also soft enough to be comfortable against their skin. Fleece is a great option because it’s lightweight and breathable, while canvas offers more durability.
Step 3: Sew the Handles
Time to get your sewing skills on! Attach the handles to the main fabric piece by sewing them securely. Here’s how:
- Position the handles on either side of the fabric, leaving enough space for your dog’s legs.
- Use a strong stitch to attach the handles. If you’re using a sewing machine, go over the seam a couple of times for added strength.
- Make sure the handles are evenly spaced and aligned with your dog’s chest measurement.
If you’re not confident in your sewing abilities, don’t worry. There are plenty of tutorials online that can help you brush up on your skills. Plus, practice makes perfect, right?
Adding Buckles or Velcro
For an extra touch of convenience, consider adding buckles or Velcro to the handles. This allows you to adjust the sling’s fit easily and ensures it stays secure while you’re using it. Just make sure the buckles or Velcro are sturdy and won’t come undone accidentally.
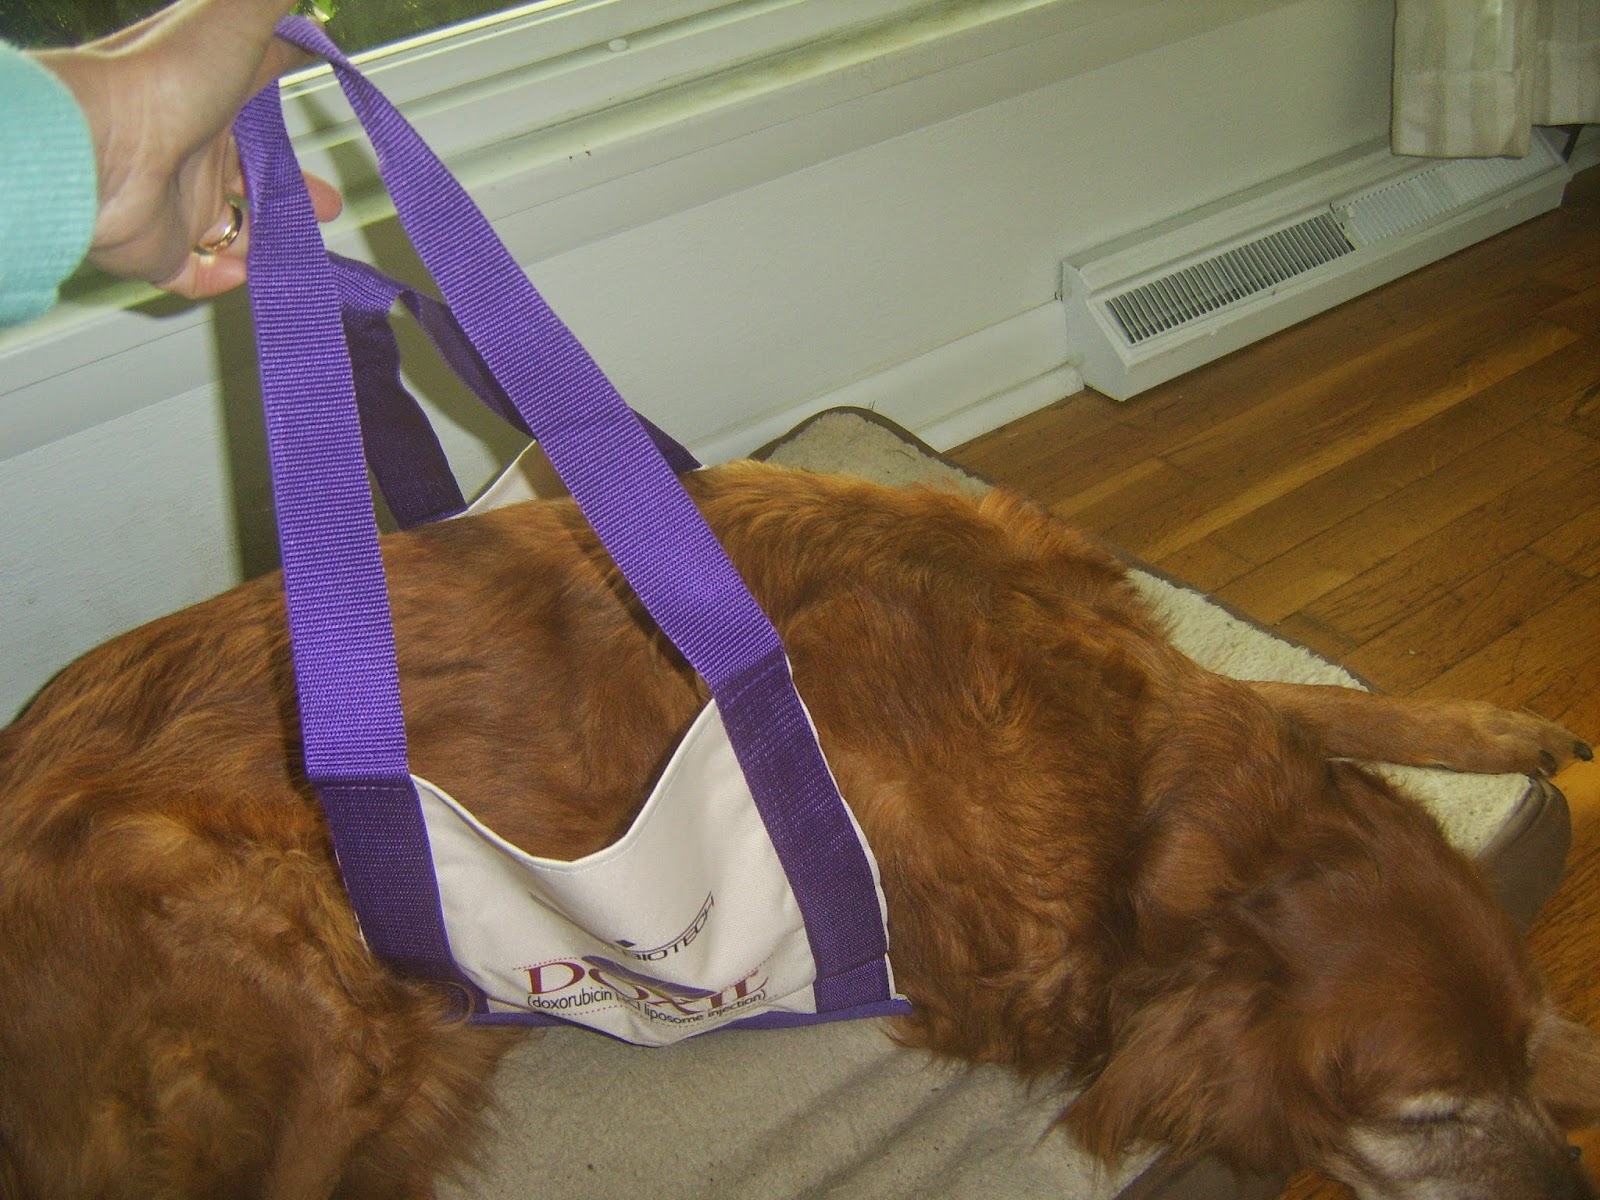
Step 4: Add Padding (Optional)
Padding is a great addition if you want to make the sling even more comfortable for your dog. Here’s how to do it:
- Cut pieces of foam padding to fit inside the fabric.
- Sew the padding into the fabric, leaving a small opening to insert it.
- Once the padding is in place, sew the opening shut.
Padding can provide extra cushioning for your dog’s belly and legs, reducing pressure points and increasing comfort. It’s especially useful for dogs with sensitive skin or those recovering from surgery.
Alternative Padding Options
If you don’t have foam padding, you can use other materials like cotton batting or even old t-shirts. Just make sure whatever you use is safe for your dog and won’t cause any irritation.
Tips for Using the Sling
Now that your sling is ready, here are a few tips to make the most of it:
- Introduce the sling gradually to your dog. Let them sniff it and get used to its presence before using it.
- Use positive reinforcement like treats or praise to make the experience enjoyable for your dog.
- Check the sling regularly for any signs of wear and tear. Replace it if necessary to ensure your dog’s safety.
Remember, the goal is to make your dog’s life easier and more comfortable. A well-fitted sling can make a world of difference in their mobility and overall happiness.
Caring for Your DIY Sling
Just like any other pet accessory, your sling needs proper care to last. Here’s how to keep it in top condition:
- Wash the sling regularly, especially if your dog has been using it frequently.
- Inspect the seams and stitching for any signs of damage. Repair them promptly to prevent further issues.
- Store the sling in a dry place to prevent mold or mildew.
Taking good care of your sling ensures it remains functional and hygienic for your dog. Plus, it’ll save you the hassle of having to make a new one too soon.
Common Questions About Dog Slings
Q: Can I use a sling for all dog breeds?
Absolutely! Whether you have a tiny Chihuahua or a giant Great Dane, a sling can be customized to fit any breed. Just make sure you adjust the measurements accordingly.
Q: How often should I use the sling?
It depends on your dog’s needs. For post-surgery recovery, you might need to use it daily. For older dogs, using it during walks or when going up and down stairs can be beneficial.
Q: Can I use the sling for cats?
While it’s technically possible, cats might not appreciate being carried in a sling as much as dogs do. However, if your cat is recovering from an injury, a smaller version of the sling could work.
Conclusion
Making a sling for your dog doesn’t have to be a daunting task. With the right materials and a bit of patience, you can create a custom sling that provides the support your furry friend needs. Not only is it cost-effective, but it’s also a great way to bond with your dog.
Remember, the key to a successful sling is proper measurement, sturdy materials, and secure stitching. Follow the steps outlined in this guide, and you’ll have a functional and comfortable sling in no time.
So, what are you waiting for? Grab your supplies and get started on this rewarding project. And don’t forget to share your experience with us in the comments below. Who knows, you might inspire others to make a sling for their dogs too!
- Aaron Pierre Wife Truth Rumors Jessica Hardwick 2025
- Dana Perinos Husband Health Battles Her Loving Goodbye
How To Make A Sling For Your Dog A Stepbystep Guide Pondicherry Cottge
How To Make A Sling For Your Dog A Stepbystep Guide Pondicherry Cottge

How To Make A Sling For Your Dog A StepbyStep Guide
